create website NGINX Amazon
In this guide, we will explain how to create and configure a website on Amazon Lightsail NGINX instance.
What is Amazon Lightsail?
Amazon Lightsail is the simplest and cost-efficient server environment runs on AWS trusted networks with the SSD-based storage and best for self-hosted small or medium websites or web-stores. Lightsail plans include a static IP address, DNS management, resource monitoring, and of course the remote access via SSH with secure key management.
Why Amazon Lightsail cheaper than EC2?
Create instance
- Step 1: Register a free Amazon Lightsail account. The free trial offer is applicable to usage within the first calendar month from when you sign up to use Lightsail.
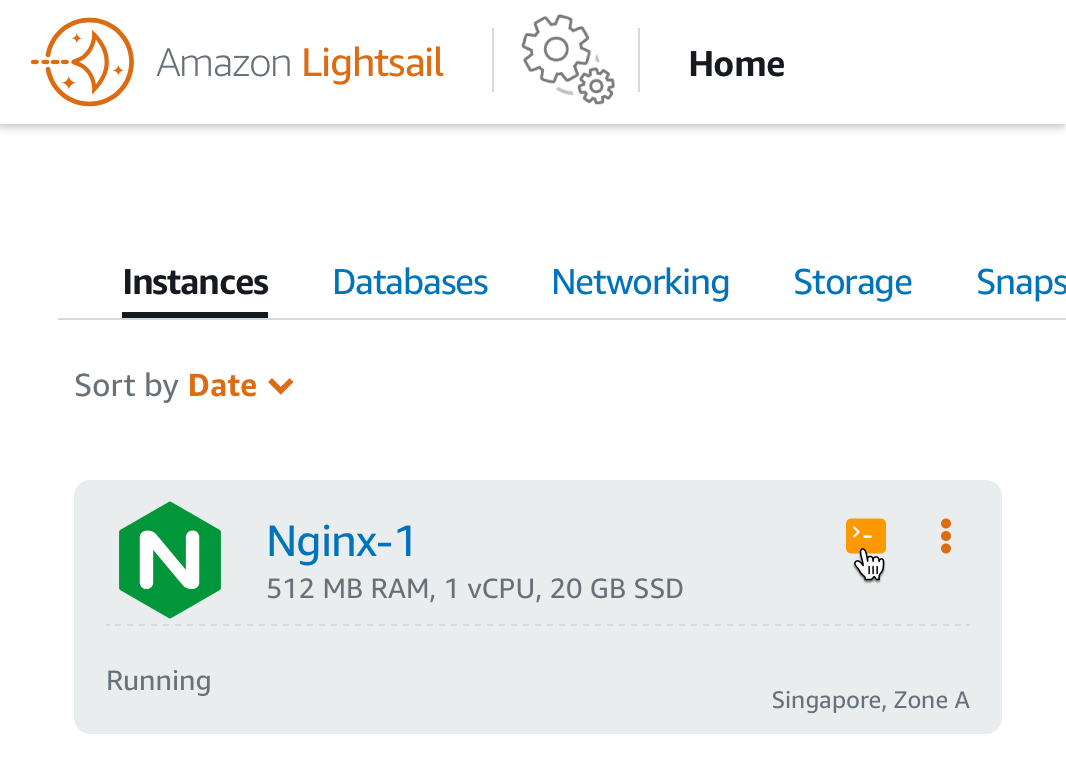
- Step 2: Login to Amazon Lightsail and go to Instances

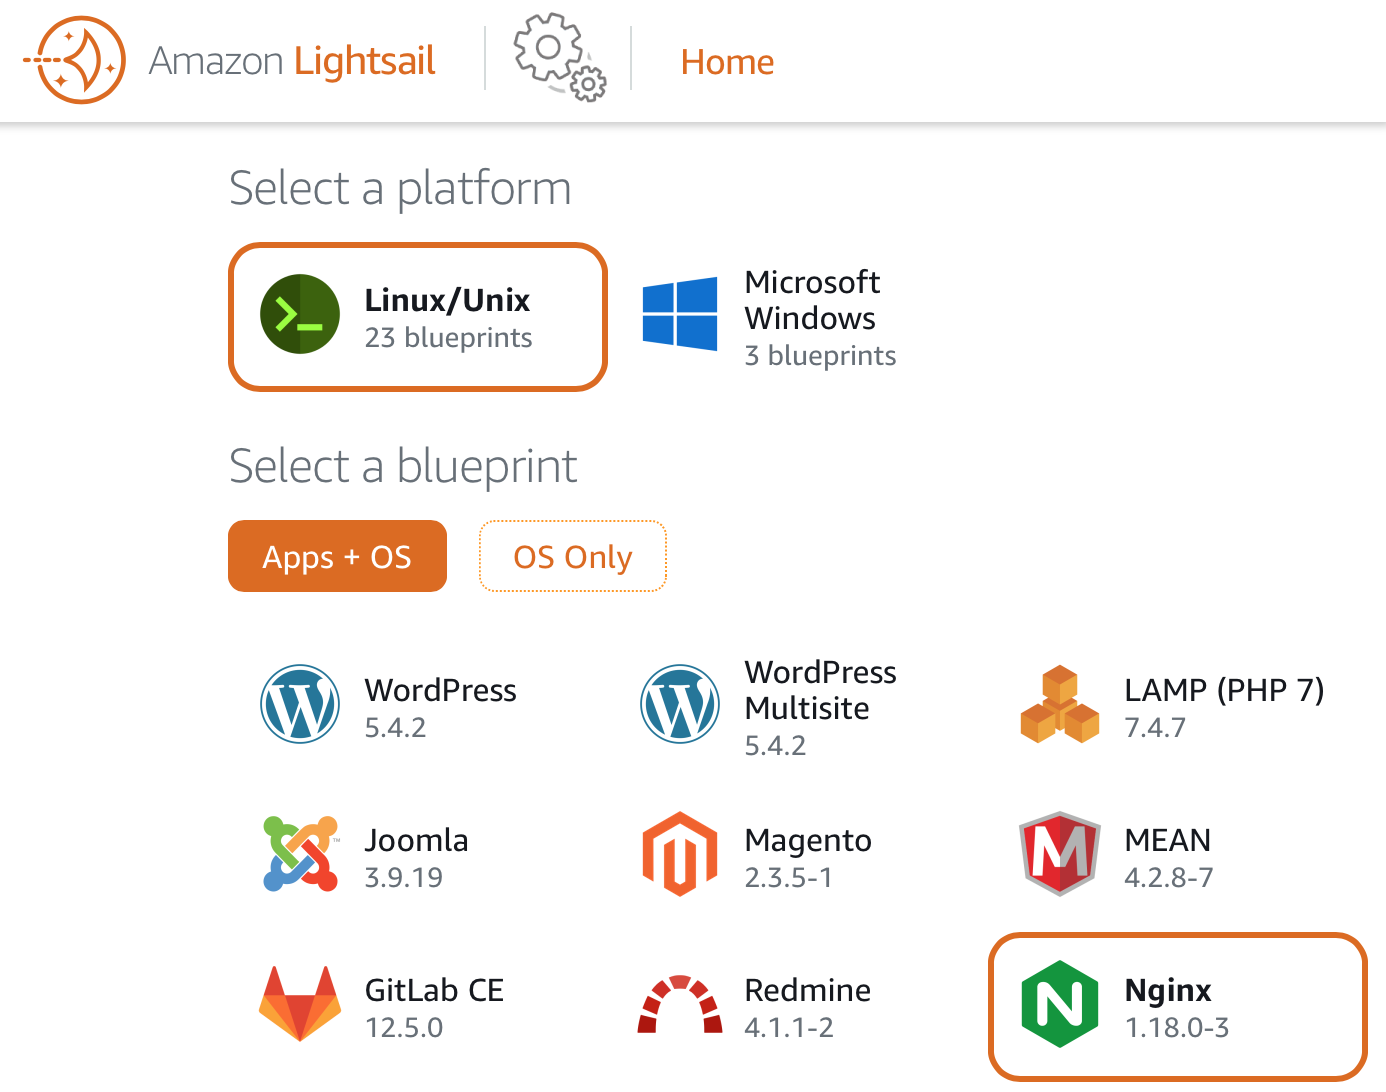
- Step 3: Pick the Linux/Unix with the Nginx instance image. Why Nginx? Nginx image is certified by Bitnami provides a complete PHP, MySQL, and Nginx fast production environment. It also pre-bundles with phpMyAdmin, SQLite, ImageMagick, FastCGI, Memcache, GD, CURL, PEAR, PECL, and other components. It is secure by default, as all ports except HTTP, HTTPS, and SSH ports are closed. Let's Encrypt SSL certificates are supported.
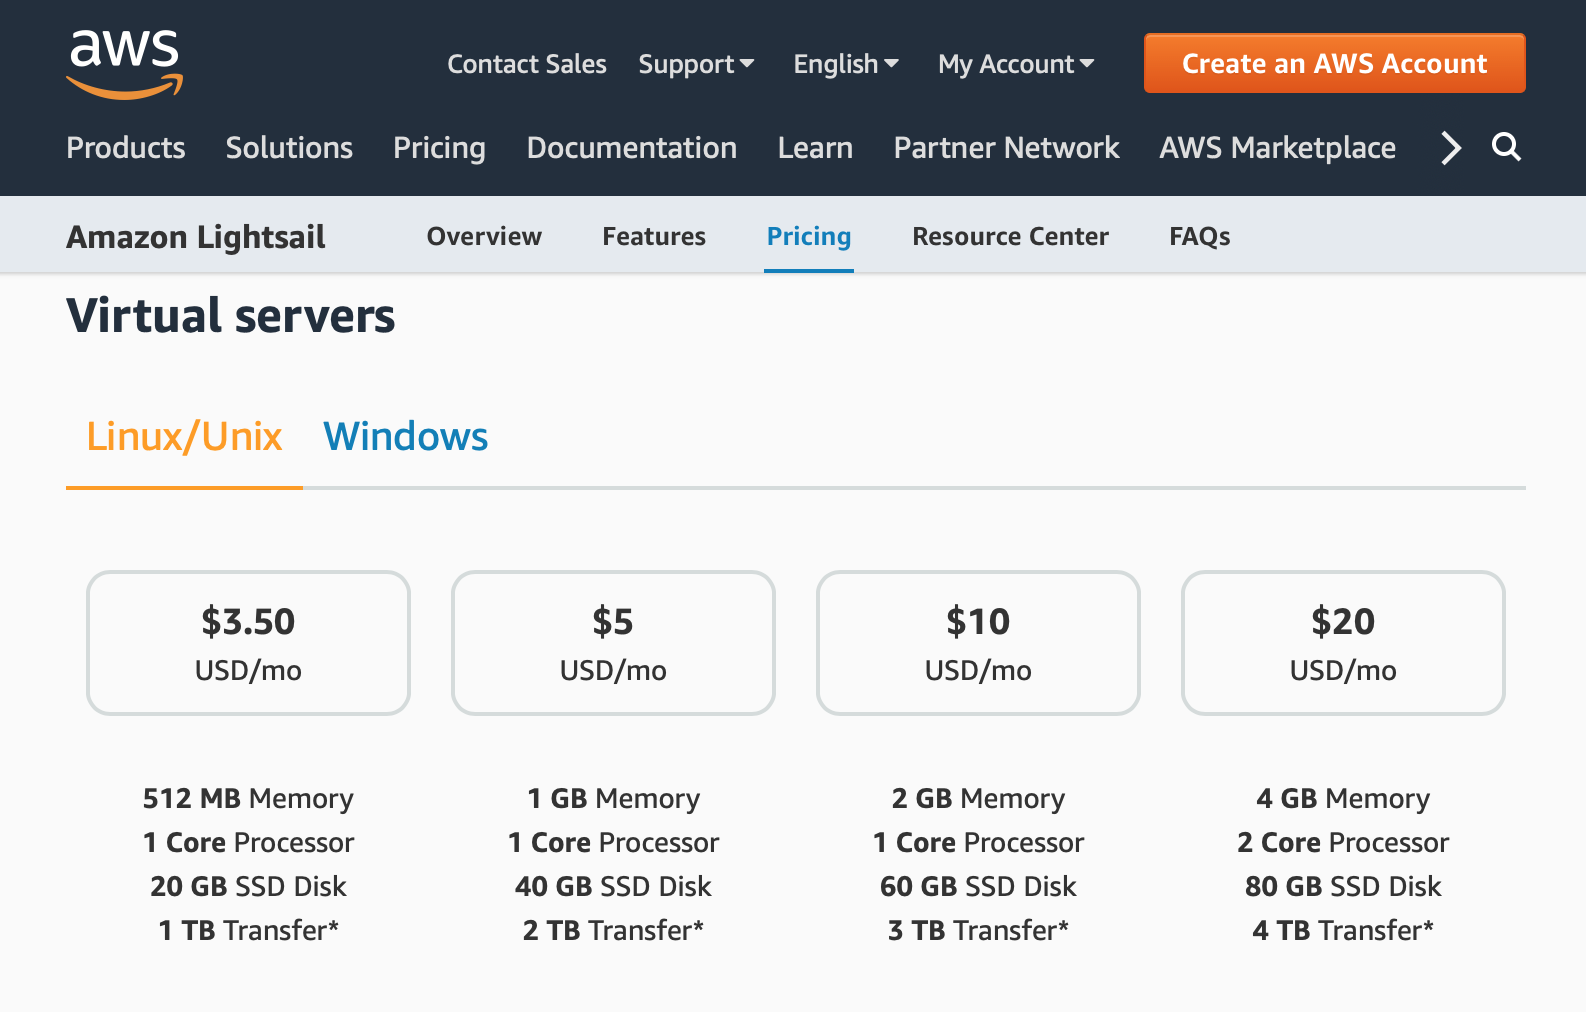
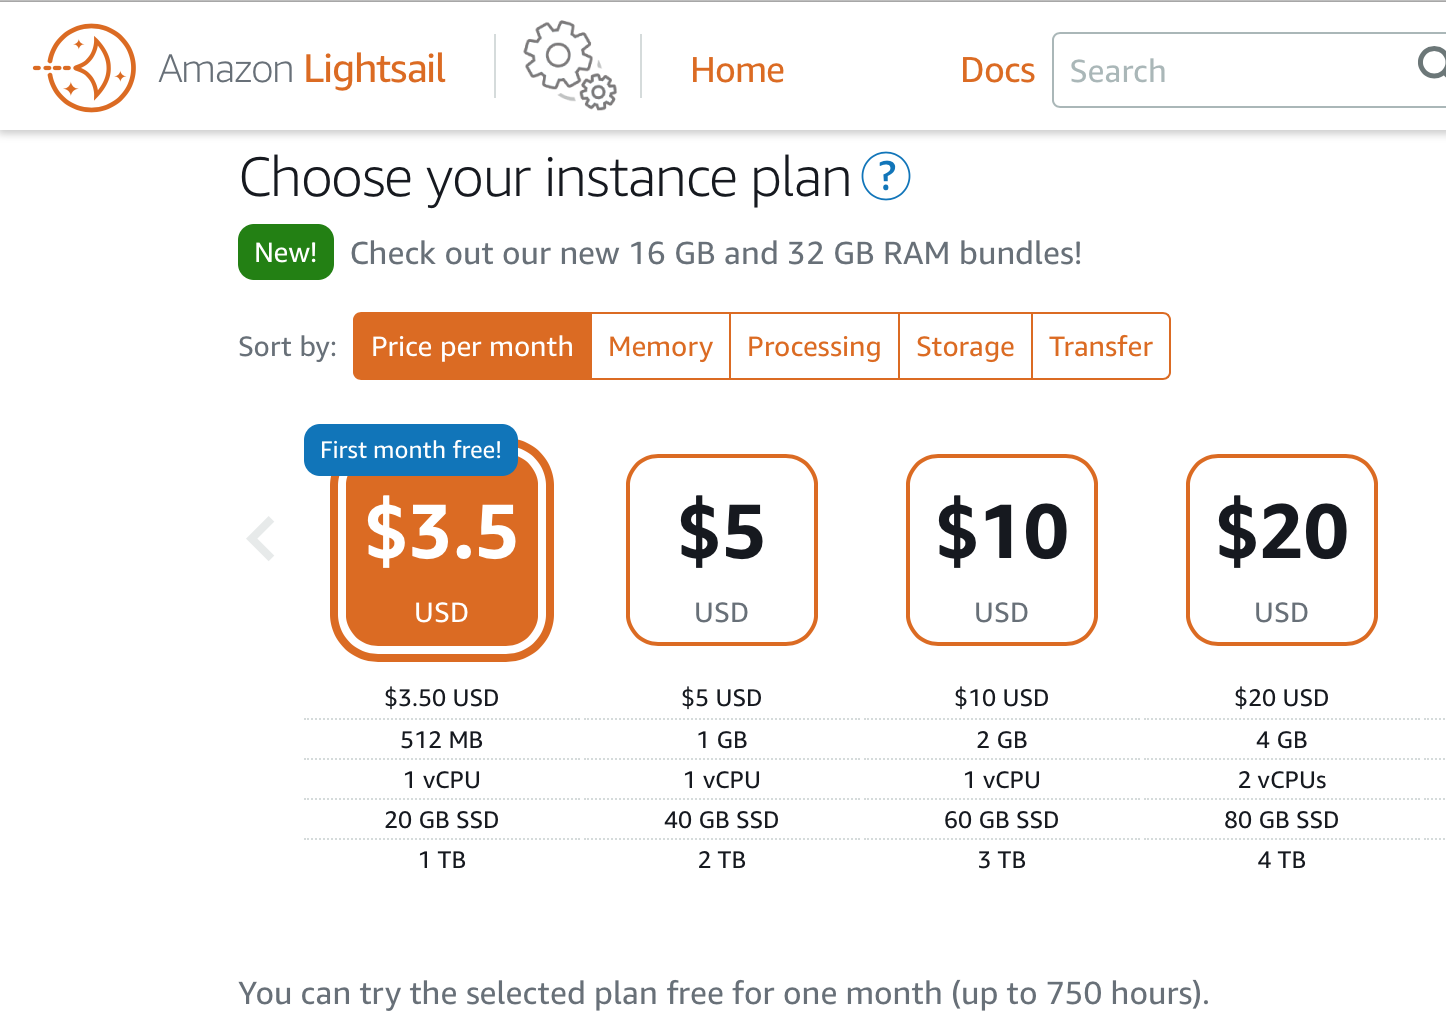
- Step 4: Choose the instance plan. The lowest is pretty good and fast for a single site
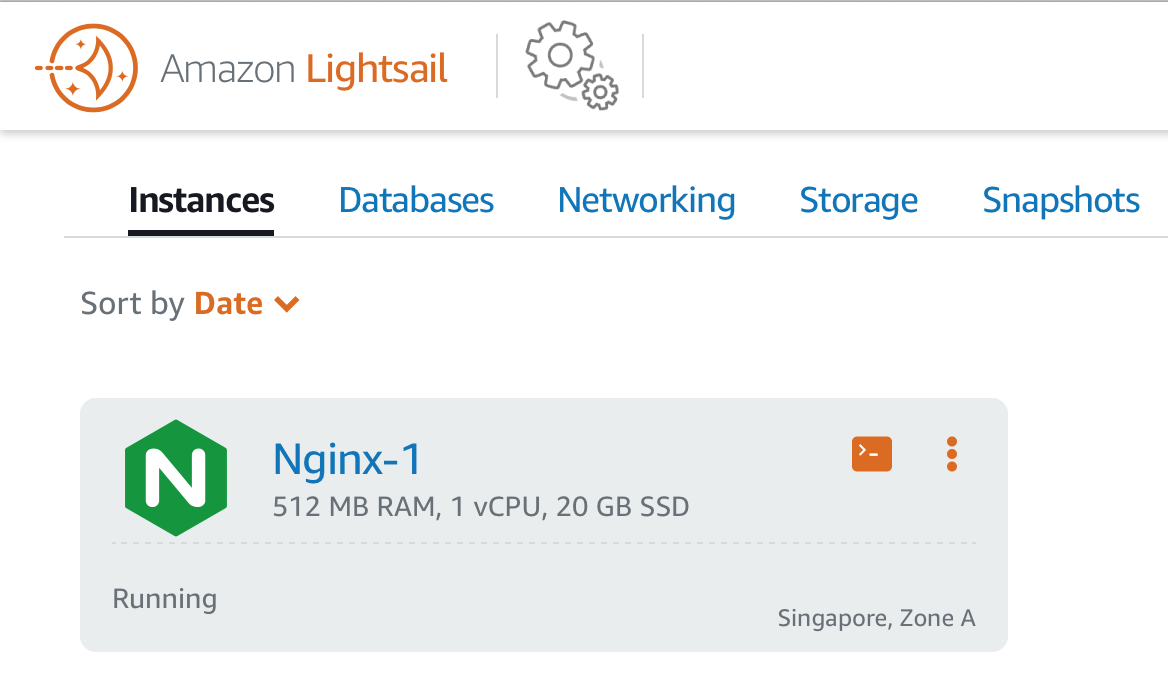
- Step 5: Wait for a moment to see your NGINX instance up and running
- Step 6: Does Your Site Need a Database? Let's create one.
Lightsail offers solid Managed Databases with $15+ pricing but we will show you how to build a website instance without a managed database, skip managed database, and do not create it.
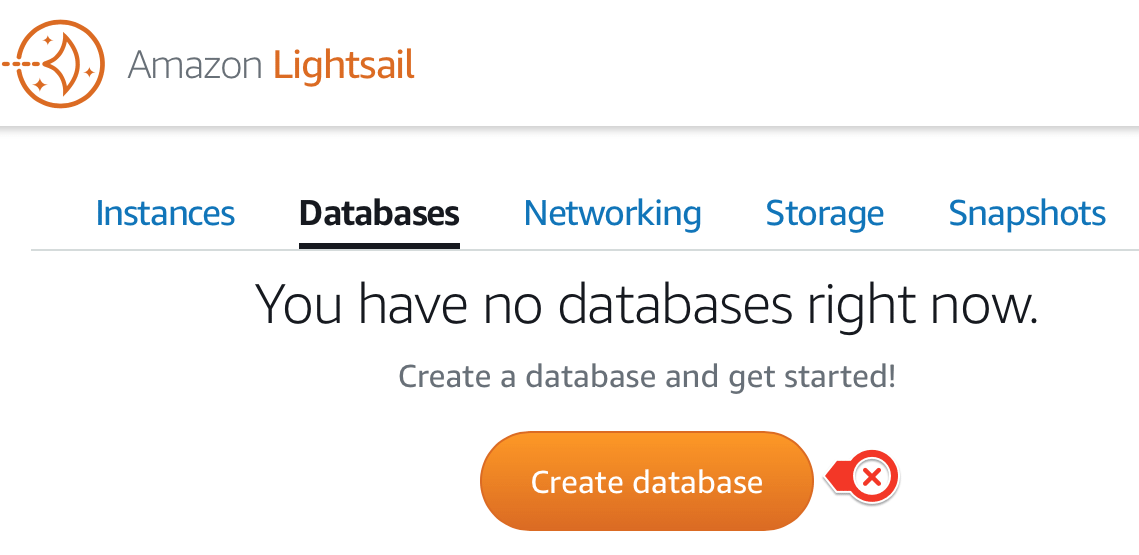
Instead, go to the next step to create a database in Nginx instance. - Step 7: Connect to your Lightsail instance with the browser-based SSH terminal. Simple and secure.
If you are looking for alternatives see guide how to Connect to your Linux/Unix-based Lightsail instance using PuTTY - Step 8: Type the mysql -V (capital) to get your MySQL version and make sure it is running.
Type mysql -u root -p to connect to the database in Nginx.
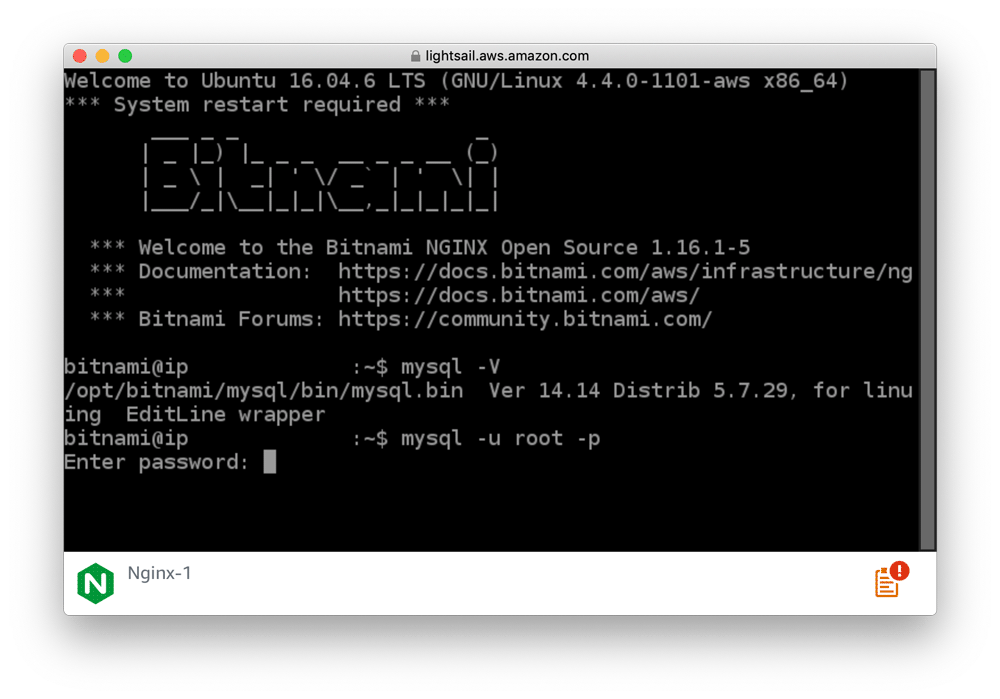
Was ist das? What is the password. - Step 9: MySQL Credentials. Default database username: root
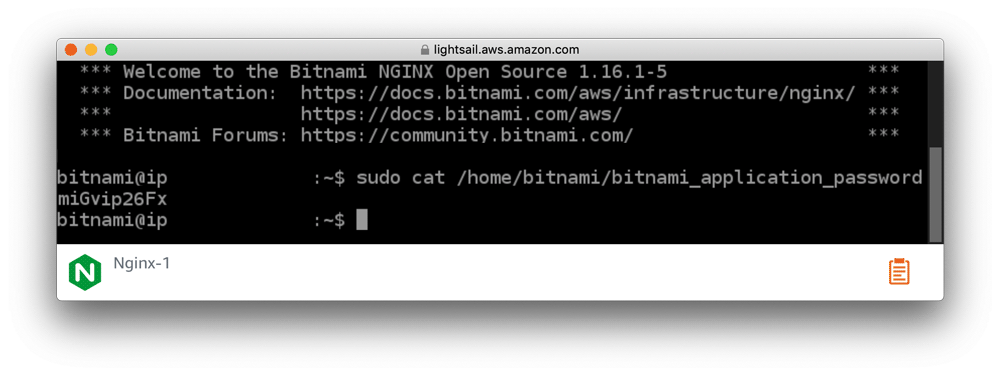
- Step 10: Obtain MySQL password. The bitnami_application_password file is located in your home directory. You can read it with the following command:
sudo cat /home/bitnami/bitnami_application_password
this will show you your MySQL user password
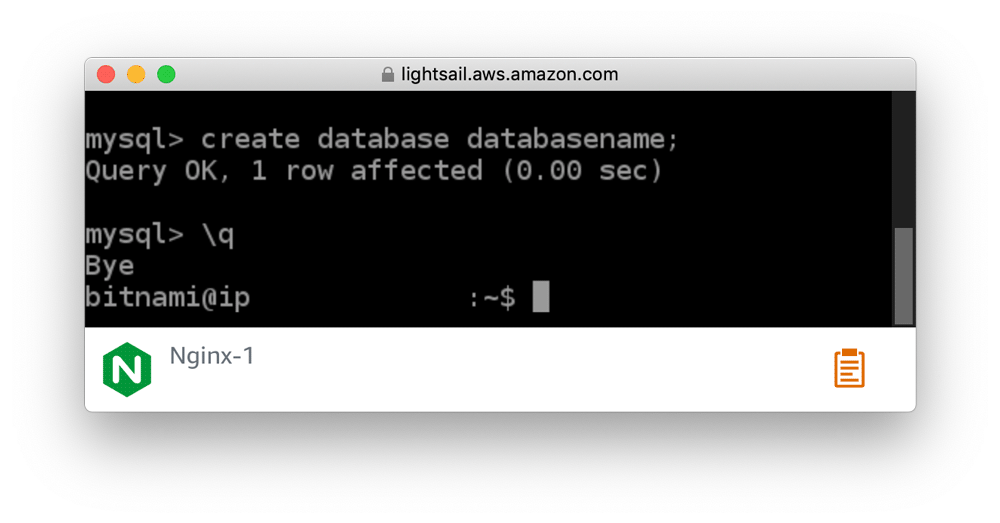
run again the mysql -u root -p and enter your MySQL password - Step 10: Create the Database Using MySQL from the Command Line.
Type create database databasename; - Step 11:Exit the MySql. Type \q
- Step 12: update server.
Typesudo apt-get update
- Step 13: Move site files to the web directory in Nginx.
the default Nginx directory web access is /opt/bitnami/nginx/html/
Nginx instance import database
to import SQL data to your database, upload SQL file to your instance, and run
cd /opt/bitnami/mysql/tmp/ or folder where you upload you file.sql file
mysql -u root -p
use database_name;
source file.sql
after import ends run to check
show tables;
quit the Mysql
\q
Nginx instance map domain
- Attach a static IP address to your Nginx instance. On your instance management page, under the Networking tab, choose to Create static IP. see Create a static IP and attach it to an instance in Amazon Lightsail.
- Create a DNS zone. On the Lightsail console home page, under the Networking tab, choose Create DNS zone. For more information, see Creating a DNS zone to manage your domain’s DNS records in Amazon Lightsail.
- To map your domain name to your Nginx instance change the name servers at your domain’s current DNS hosting provider
- Write down the Lightsail name servers that are listed in on your domain's DNS zone management page.
- Sign in to your domain’s current DNS hosting provider’s website.
- Find the page where you can edit your domain's name servers.
- Enter the Lightsail name servers, and remove other name servers listed.
create a free SSL certificate with your Nginx in Amazon Lightsail
Follow Amazon Lightsail guide
Setup several websites on one nginx instance
Read Part 2 of this guide to find out how to add two or more sites with subdomains in a single instance of Nginx. How to create a subdomain on AWS Lightsail?