Setup subdomain website on Amazon Lightsail NGINX

PART 2 of the creating website NGINX Amazon guide
- Step 1: add subdomain A record to your Amazon DNS Zone. For more information, see DNS in Amazon Lightsail.
Select A record type the subdomain and select the static IP attached to your server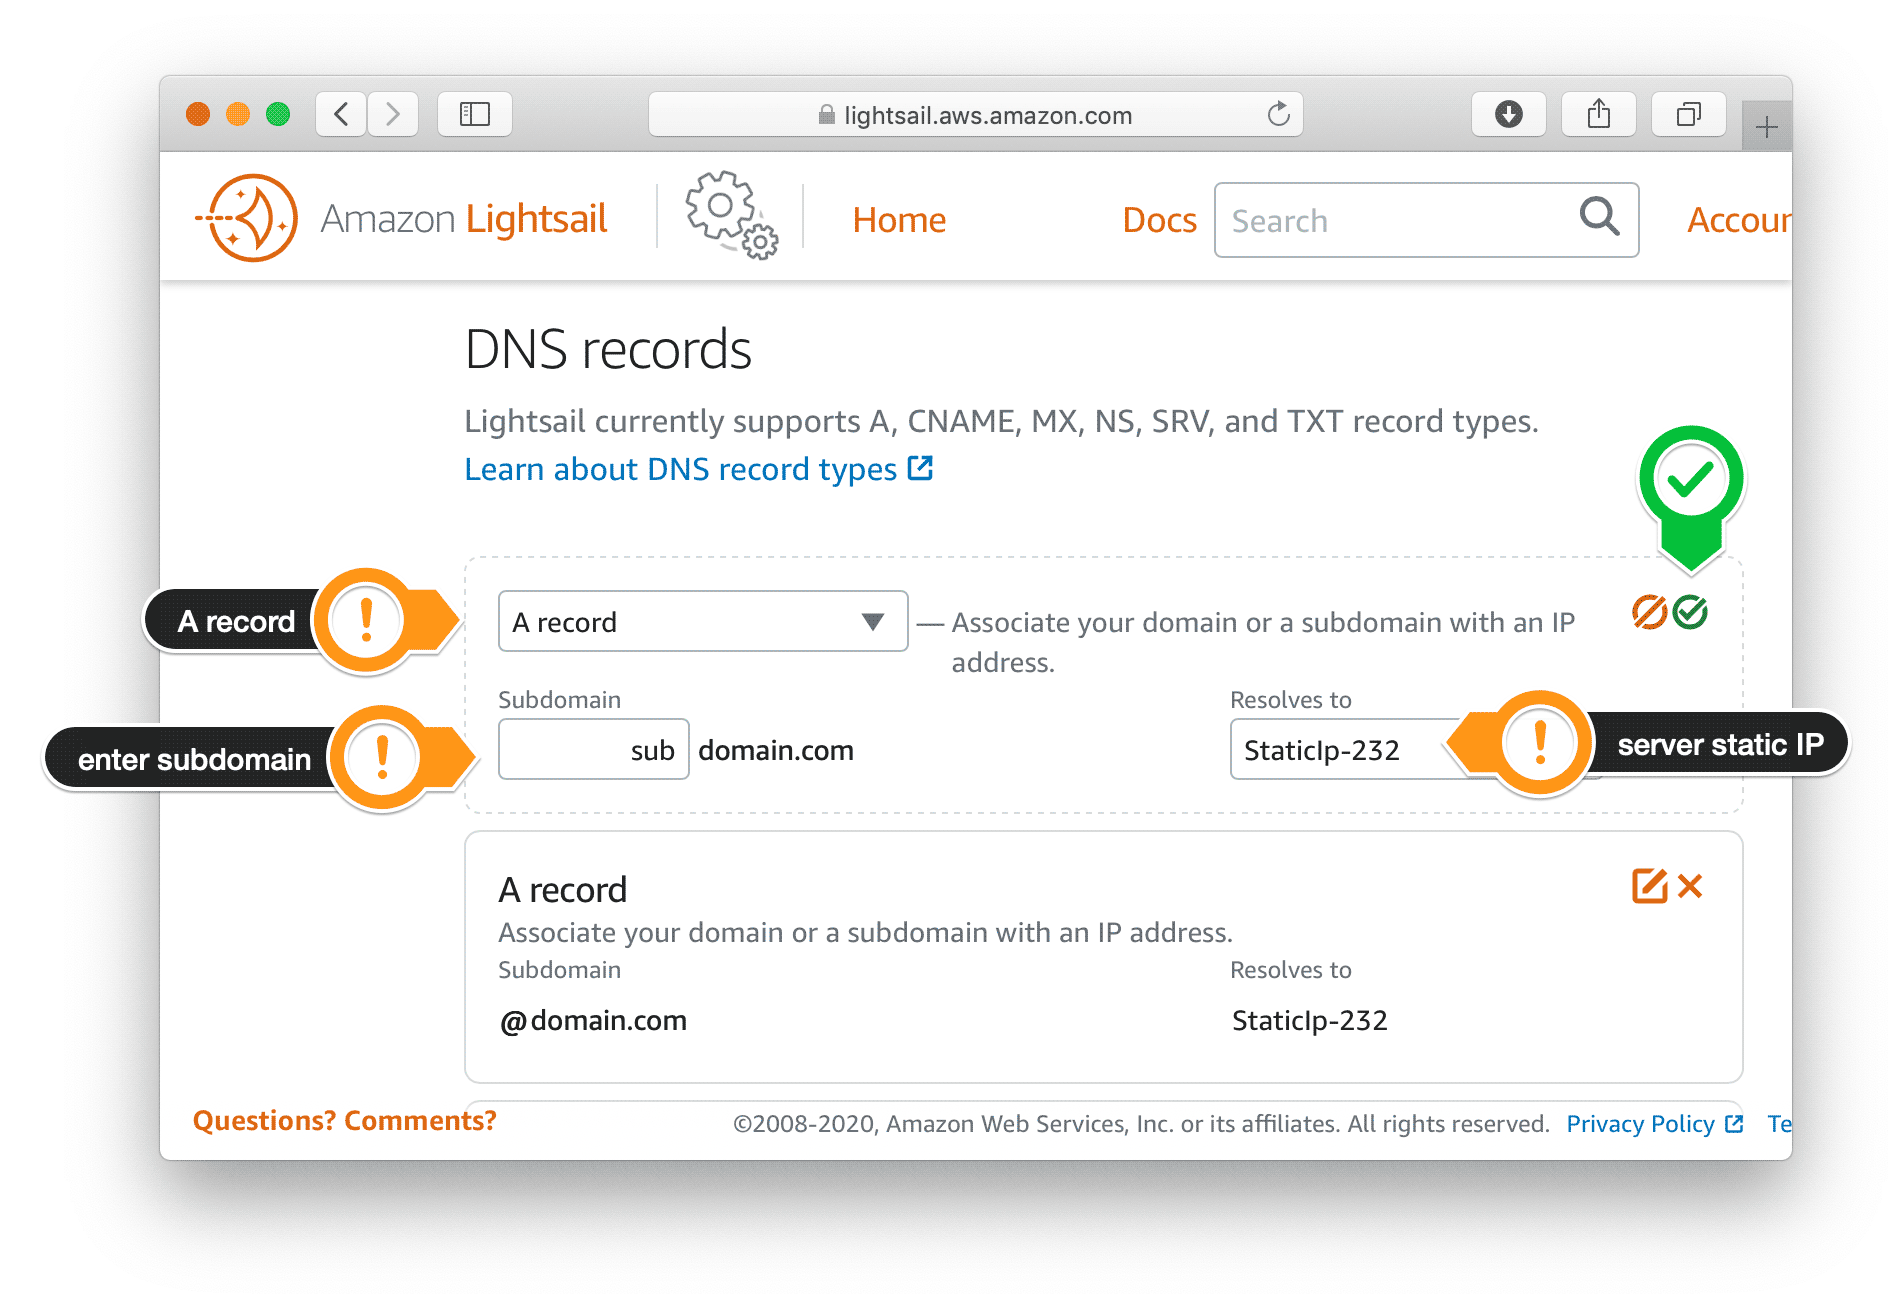
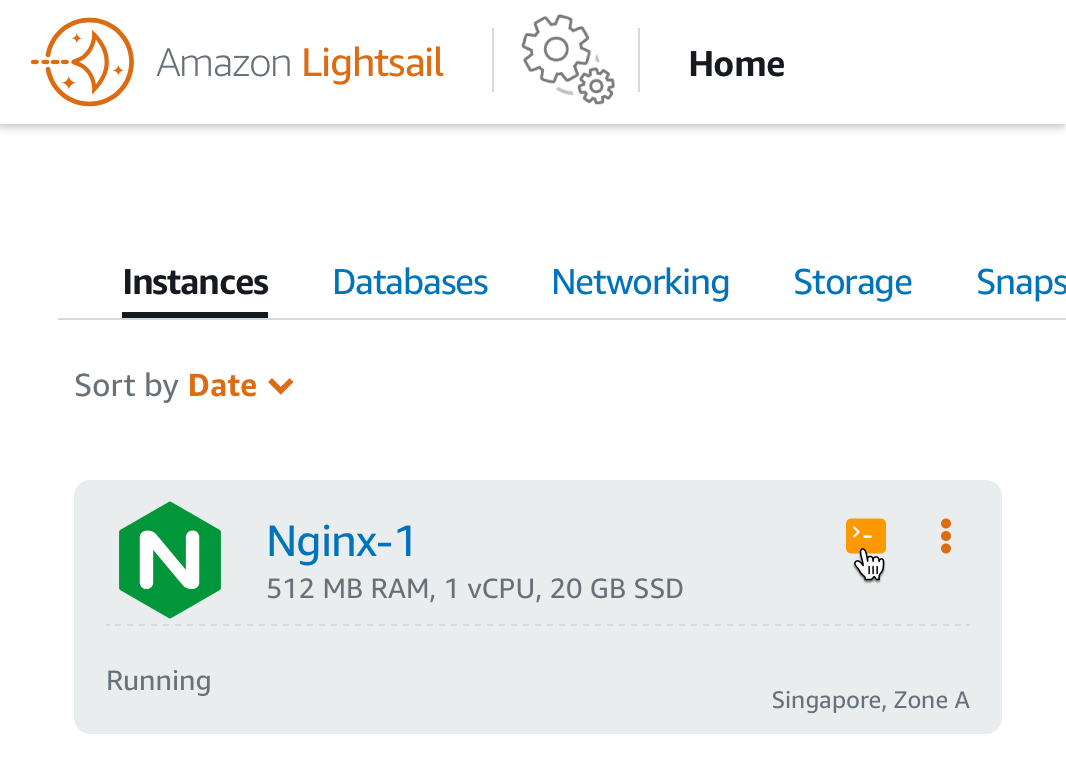
- Step 2: Connect to your Lightsail instance with the browser-based SSH terminal. Simple and secure.
- Step 3: Type commands in the terminal.
sudo mkdir /opt/bitnami/apps/newapp
where newapp is the folder where the new website will runsudo chown -R root:root /opt/bitnami/apps/newapp sudo chmod -R 755 /opt/bitnami/apps/newapp
- Step 4: Create a conf directory.
sudo mkdir /opt/bitnami/apps/newapp/conf
sudo chown -R root:root /opt/bitnami/apps/newapp/conf
sudo chmod -R 755 /opt/bitnami/apps/newapp/conf
- Step 5: Create htdocs directory.
sudo mkdir /opt/bitnami/apps/newapp/htdocs
sudo chown -R bitnami:daemon /opt/bitnami/apps/newapp/htdocs
sudo chmod -R 755 /opt/bitnami/apps/newapp/htdocs
- Step 6: in the /opt/bitnami/apps/newapp/conf folder you can create a file nginx-app.conf
sudo touch /opt/bitnami/apps/newapp/conf/nginx-app.conf
sudo chown -R root:root /opt/bitnami/apps/newapp/conf/nginx-app.conf
sudo chmod -R 644 /opt/bitnami/apps/newapp/conf/nginx-app.conf
- Step 7: in the /opt/bitnami/apps/newapp/conf folder you can create a file nginx-vhosts.conf
sudo touch /opt/bitnami/apps/newapp/conf/nginx-vhosts.conf
sudo chown -R root:root /opt/bitnami/apps/newapp/conf/nginx-vhosts.conf
sudo chmod -R 644 /opt/bitnami/apps/newapp/conf/nginx-vhosts.conf
- Step 8: add content to the /opt/bitnami/apps/newapp/conf/nginx-vhosts.conf file.
In the terminalsudo vim /opt/bitnami/apps/newapp/conf/nginx-vhosts.conf
pres i and add text, pres ESC and type :wq! to save fileserver { listen 80; root "/opt/bitnami/apps/newapp/htdocs"; server_name subdomain.example.com; include "/opt/bitnami/apps/newapp/conf/nginx-app.conf"; } server { listen 443 ssl; root "/opt/bitnami/apps/newapp/htdocs"; server_name subdomain.example.com; #ssl_certificate "/opt/bitnami/apps/newapp/certs/server.crt"; #ssl_certificate_key "/opt/bitnami/apps/newapp/certs/server.key"; #ssl_session_cache shared:SSL:1m; #ssl_session_timeout 5m; #ssl_ciphers HIGH:!aNULL:!MD5; #ssl_prefer_server_ciphers on; include "/opt/bitnami/apps/newapp/conf/nginx-app.conf"; } - Step 9: add content to the /opt/bitnami/apps/newapp/conf/nginx-app.conf file.
In the terminalsudo vim /opt/bitnami/apps/newapp/conf/nginx-app.conf
pres i and add text, press ESC and type :wq! to save fileindex index.php index.html index.htm; #allow 127.0.0.1; #deny all; # Deny all attempts to access hidden files such as .htaccess or .htpasswd. location ~ /\. { deny all; } location ~ \.php$ { fastcgi_split_path_info ^(.+\.php)(/.+)$; fastcgi_read_timeout 300; fastcgi_pass unix:/opt/bitnami/php/var/run/www.sock; fastcgi_index index.php; fastcgi_param SCRIPT_FILENAME $request_filename; include fastcgi_params; } - Step 10: add line to the bottom of file /opt/bitnami/nginx/conf/bitnami/bitnami-apps-vhosts.conf
In the terminalsudo vim /opt/bitnami/nginx/conf/bitnami/bitnami-apps-vhosts.conf
pres i and add text, pres ESC and type :wq! to save fileinclude "/opt/bitnami/apps/newapp/conf/nginx-vhosts.conf";
- Step 11: Restart the server
In the terminalsudo /opt/bitnami/ctlscript.sh restart